 how-to
7 Steps to Replace or Repair an RV Door Lock
Last Updated: October 28, 2026
Quick Summary
RV lock replacement starts with diagnosis: a worn cylinder feels gritty or sticks, while a misaligned latch turns smoothly but won't catch the strike plate. Check which problem you have before buying anything. Gather tools and measure the door bore, then remove the old lock, install the new one, and test the latch.
- A key that turns freely but won't latch usually needs strike plate adjustment, not a new lock.
- Measure the door thickness and bore size before ordering a replacement lock.
- Keyless locks often fail from dead or corroded batteries, so replace them first.
- Rekey when the lock body is sound; replace when the cylinder is worn or the housing is damaged.
- Keep the old lock assembly until the new one works reliably.
Table of Contents
- Diagnose the Problem Before You Replace Anything
- RV Lock Replacement Tools and Parts You Need
- How to Remove the Old RV Entry Door Lock
- RV Lock Installation Steps for a Secure Fit
- Keyless RV Door Lock Troubleshooting and Battery Replacement
- Rekeying and Matching Keys for Your RV Locks
- When to Call a Locksmith for Your RV Door
- Frequently Asked Questions
Diagnose the Problem Before You Replace Anything
Most RV door lock problems look the same from the outside: the key won't turn, the handle feels loose, or the door won't latch. The fix depends on what is actually broken, so run a careful diagnosis before any rv lock replacement.
Start by testing the key in the lock, then testing the latch with the door open and closed. Note whether the problem happens every time or only in certain weather.
Signs the Cylinder Is Worn Versus the Latch Is Misaligned
A worn cylinder usually feels gritty, sticks partway through the turn, or lets the key wiggle loosely.
A misaligned latch behaves differently. The key turns smoothly, but the bolt does not line up with the strike plate. The door may rattle, bind, or need a hard push to close.
- Worn cylinder: Key sticks, feels loose, or only works at certain angles
- Misaligned latch: Key turns fine, but the door won't latch or feels loose
- Failed keypad or keyless lock: Lock does not respond even with fresh batteries
If the key turns freely and the door still won't latch, adjust the strike plate before buying a new lock.
RV Lock Replacement Tools and Parts You Need
Gather everything before you start. Stopping halfway to hunt for a screwdriver makes the job harder and raises the risk of losing small screws.
Basic tools for most RV entry-door jobs include:
- A Phillips screwdriver and a flat-head screwdriver
- A cordless drill with a bit set
- A pencil and a tape measure
Parts to check before you buy a replacement:
- Lock cylinder type: Check whether the existing lock uses a common key or a specialty key
- Door thickness and bore size: Measure the hole in the door so the new lock fits
- Paddle or handle style: Note whether the lock uses an exterior paddle, a keypad, or a keyless system
Keep the old lock assembly until the new one works. Fleets and businesses with commercial-grade door hardware can review commercial locksmith services to see what those systems cover before sourcing parts. It helps to compare hardware and confirm the bolt throw matches.
How to Remove the Old RV Entry Door Lock
Work slowly. RV doors often have thin panels, and forcing a stuck part can crack the frame.
- Open the door and support it. Use a chock or helper so the door does not swing shut while you work.
- Remove the interior trim or cover. Look for screws behind the handle or latch plate.
- Take out the mounting screws. Keep them together in your container.
- Disconnect any wiring. Keyless and keypad locks often have a battery pack or harness that must be unplugged first.
- Pull the lock assembly out. Wiggle it gently if it sticks, and check for old sealant or debris.
Take a photo before each step so you can match the orientation when installing the new lock.
RV Lock Installation Steps for a Secure Fit
A tight, square fit keeps the lock working and helps prevent rattling on the road, which is why careful alignment matters during any rv lock replacement. Take your time lining up the bolt.
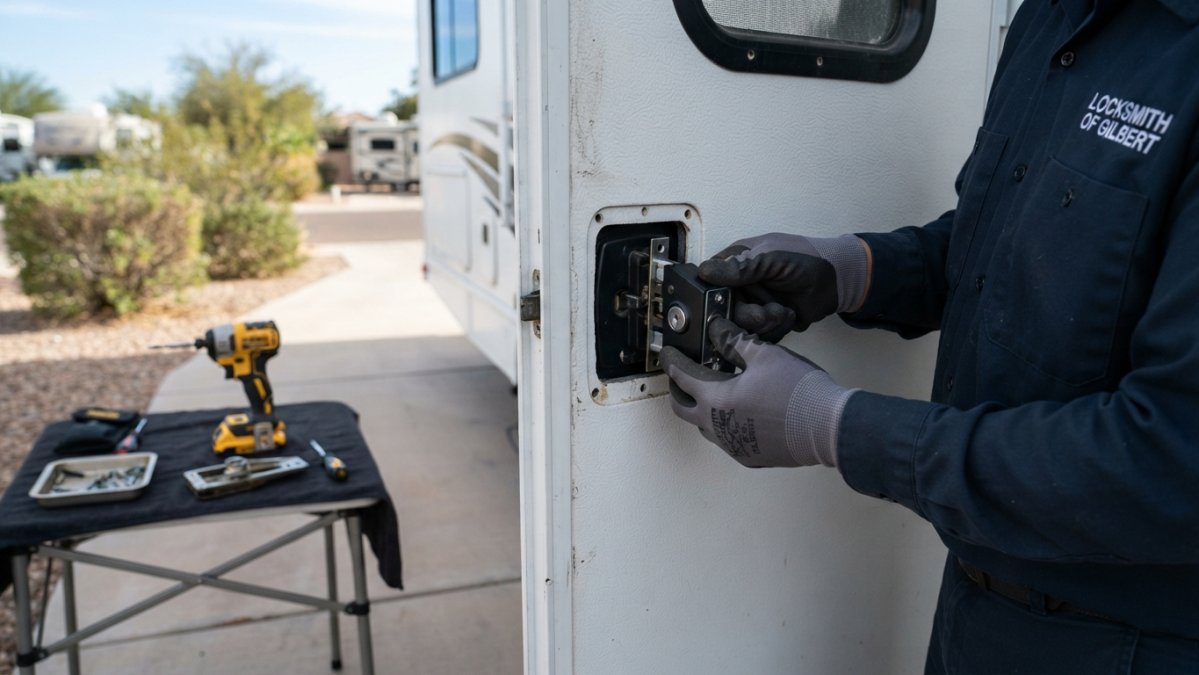
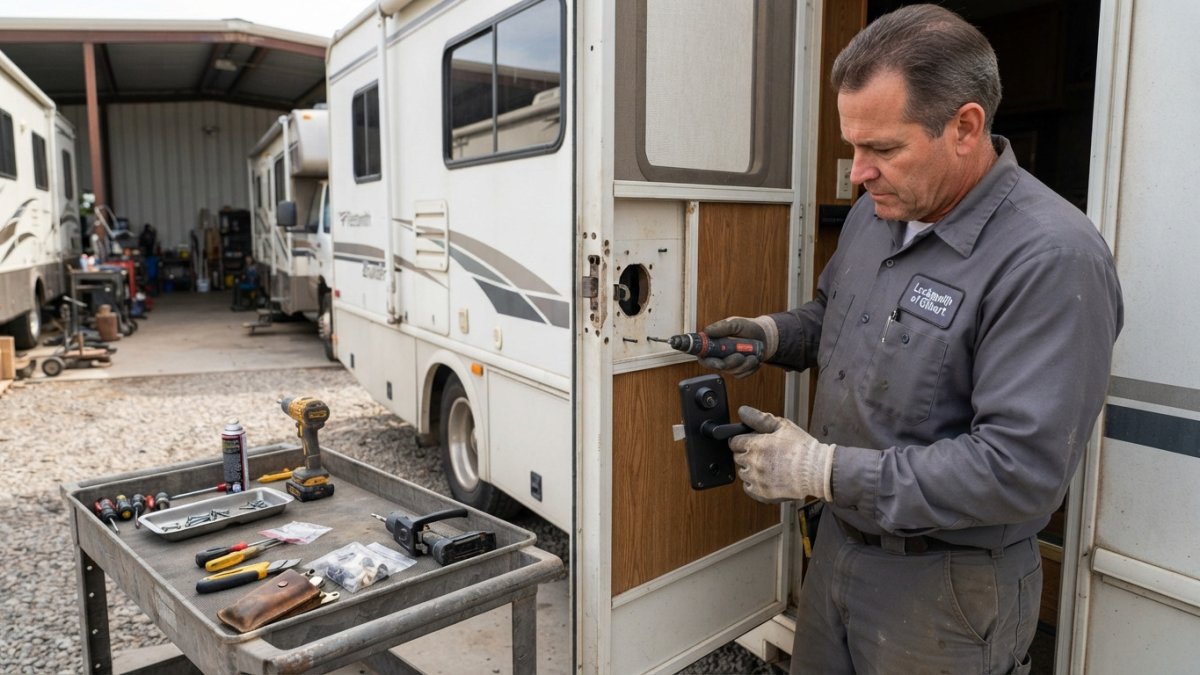
![Close-up of hands in work gloves fitting a new keyed entry lock into the door of a white motorhome, with a cordless screwdriver and paddle hardware on a folding table nearby | section:RV Lock Installation Steps for a Secure Fit]
- Test the new lock outside the door. Confirm the key turns the cylinder and the bolt moves smoothly.
- Insert the lock into the door bore. Make sure the gasket or seal sits flat against the door.
- Attach the mounting hardware. Tighten screws evenly so the lock does not twist.
- Install the interior assembly. Connect any wiring or keypad harness before securing the trim.
- Test the latch. Close the door several times and check that the bolt engages the strike plate cleanly.
If the bolt does not line up, loosen the strike plate, shift it slightly, and retighten. Small adjustments usually solve alignment problems.
Keyless RV Door Lock Troubleshooting and Battery Replacement
Keyless and keypad locks fail in predictable ways. Before you replace the lock, isolate whether the problem is power, signal, mechanical alignment, or the keypad itself. This diagnostic sequence saves you from buying a new lock when a battery or wire is the real culprit.
Step 1: Rule Out Power Problems
Most keyless failures start with low voltage. Replace the batteries first, even if the keypad lights up. Weak batteries can power the lights but not the motor or solenoid.
- Battery type: Most RV keyless entry locks use four AA alkaline batteries, but some models use two CR123A lithium batteries or a 9-volt. Check the battery compartment label or the manufacturer's manual before buying replacements.
- Battery life: Expect 6 to 12 months of normal use. Extreme heat (common in RV exteriors) shortens battery life, so replace batteries at the start of each camping season.
- Corrosion: Clean battery contacts with a dry cloth or a pencil eraser. White or green crust on the terminals blocks current even with fresh batteries.
After replacing batteries, test the lock immediately. If it works, note the date on a piece of tape inside the battery compartment so you know when to replace them next.
Step 2: Test the Keypad and Wiring
If fresh batteries do not fix the problem, test the keypad and wiring.
- Keypad response: Press a few buttons. If the keypad beeps or lights up but the lock does not move, the keypad is working and the problem is likely the motor or wiring.
- No response at all: Check for a loose battery connector or a tripped fuse. Some keyless locks have an inline fuse; inspect it and replace if blown.
- Wiring harness: Remove the interior trim and check that the harness connector is fully seated. A partially connected plug can cause intermittent failures. Look for pinched or chafed wires where the door hinges.
Step 3: Distinguish Motor Failure from Mechanical Binding
A failed motor and a misaligned latch can feel similar: the lock does not throw the bolt. To tell them apart:
- Listen: A working motor makes a short whirring or clicking sound. Silence suggests no power or a dead motor. A strained sound suggests binding.
- Manual override: Most keyless locks include a key override. Turn the key by hand. If the bolt moves smoothly, the motor or wiring is at fault. If the key is hard to turn, the latch or bolt is binding.
- Voltage test: Use a multimeter to check voltage at the motor connector when you press the keypad. No voltage indicates a wiring or keypad fault; voltage present but no movement indicates a failed motor.
Step 4: Reset the Keypad or Control Board
Many keyless locks have a reset procedure that clears programming errors. The sequence varies by model, common methods include holding the program button for 5 seconds, pressing a reset button with a paperclip, or removing batteries for 30 seconds and reinserting them. Consult your lock's manual for the exact steps.
Do not assume a keyless lock is broken just because the keypad does not respond. A dead battery, corroded contact, or loose wire causes most failures. Replace the battery first, then test the keypad, then check wiring before buying a new lock.
When to Replace the Keyless Lock
Replace the lock if:
- The motor does not run even with correct voltage at the connector.
- The keypad is unresponsive after a reset and battery replacement.
- The internal mechanism is cracked or corroded beyond cleaning.
If you replace the lock, confirm the new model fits the existing door prep (see the fitment checklist in the installation section).
Rekeying and Matching Keys for Your RV Locks
Rekeying changes the internal pins so old keys no longer work, without replacing the entire lock. It is the right choice when the lock body is in good condition but you want new keys, after buying a used RV, losing a key, or moving into a rental. Replacing the lock is better when the cylinder is worn, the housing is damaged, or you want to upgrade to a keyless system.
How Rekeying Works
A lock cylinder contains a set of pins (usually five) that must align at the shear line when the correct key is inserted. Rekeying replaces those pins with a new set that matches a different key. The lock body, latch, and handles stay the same.
- Tools: A locksmith uses a pin kit, a plug follower, and a key gauge. DIY rekey kits are available for common cylinder types, but they require patience and the right pin sizes.
- Time: A locksmith typically rekeys a single RV door lock in 15-30 minutes. DIY rekeying may take 45-60 minutes for a first attempt.
- Cost: A locksmith service call for rekeying usually costs $50-$100 per lock, depending on your area and the lock type. DIY kits cost $20-$40 and can be reused.
When to Rekey vs. Replace
| Situation | Rekey | Replace |
|---|---|---|
| You bought a used RV and want new keys | ✓ | |
| You lost a key and want to invalidate the old one | ✓ | |
| The key is hard to turn or the cylinder feels gritty | ✓ | |
| The lock housing is cracked or the latch is misaligned | ✓ | |
| You want one key for entry door and storage compartments | ✓ (if locks are compatible) | |
| You want to upgrade to a keyless lock | ✓ |
Matching Keys Across Multiple Locks
Many RVs use the same key code for the entry door and storage compartments, but not always. To match keys:
- Check the key code: Look for a code stamped on the key or the lock cylinder. A locksmith can cut a new key from the code without needing the original.
- Use a keyed-alike kit: Some lock manufacturers sell cylinders that can be pinned to match your existing key. This lets you keep one key for all locks.
- Replace storage locks: If matching is not possible, replace storage compartment locks with units that accept the same key as the entry door. Many aftermarket storage locks are available in keyed-alike sets.
Duplicate keys only from a good original. A worn key can be copied, but the copy will wear faster and may stick. If your only key is worn, have a locksmith cut a new key from the lock code rather than duplicating the worn key.
Key Codes and Duplication
RV keys often have a code stamped on the head (e.g., “CH751” for common storage locks). A locksmith can cut a key from the code even if you do not have the original. For entry doors, the code may be on the cylinder face or inside the lock body. Bring the lock or a clear photo to a locksmith if you cannot find the code.
Security Upgrade: Moving Beyond Common Keys
Many RV storage compartments use the CH751 key, which is widely known and offers little security. Upgrading to a unique key code or a keyless storage lock is a simple way to improve security. Rekeying or replacing those locks to a non-standard code is a low-cost upgrade.
When to Call a Locksmith for Your RV Door
Some jobs are better left to a professional. Call for help if:
- The lock is damaged, bent, or stuck in the door
- You are locked out and cannot open the door
- The door frame or strike plate has cracked or pulled loose
Locksmith of Gilbert handles residential, commercial, and automotive lock service across the eastern valley of the greater Phoenix area. We also serve commercial clients. Contact us for current pricing or a quote, and we will confirm the right fix for your lock.
Frequently Asked Questions
How do you replace an RV door lock?
Remove the interior paddle and the screws that hold the lock assembly, then pull the old cylinder and latch out of the door. Check that the replacement matches the bore size and backset of the old lock, insert the new assembly from the exterior side, and secure it with the mounting screws. Test the latch and key action before you close the panel. Most entry-door swaps take a single afternoon with basic hand tools.
Can an RV lock be repaired instead of replaced?
Often, yes. If the cylinder turns but the bolt does not move, the problem may be a loose or broken connecting rod or a worn latch rather than the lock itself. Lubricating the cylinder and tightening the mounting screws resolves many sticking locks. A full replacement makes sense when the cylinder is worn, the lock is damaged or corroded, or you want a keyless upgrade. Compare the repair cost of parts against a new assembly.
Why is my RV door lock not working?
The most common causes are a worn cylinder, a bent or disconnected linkage behind the lock, a door that has shifted so the latch no longer lines up with the strike plate, or a dead battery on keyless models. Start by checking whether the key turns freely, whether the latch retracts when the paddle is pressed, and whether the door closes squarely. Identifying which part has failed prevents replacing a lock that was not the real problem.
How do you rekey an RV lock?
Rekeying replaces the internal pins in the cylinder so the existing lock accepts a new key without changing the hardware. You remove the cylinder, swap the pin stacks or the cylinder core, and reinstall it with a new key set. Rekeying is useful after a lost key or when you want one key to open several RV doors and storage compartments. Not every RV lock is designed for rekeying, so confirm the cylinder type first.