 how-to
Residential Deadbolt Installation: Best Practices Guide
Table of Contents
- Why Residential Deadbolt Installation Matters for Home Security
- Deadbolt Installation Tools List: What You'll Need
- Measuring, Marking, and Preparing Your Door
- Drilling the Borehole and Latch Hole
- Installing the Latch, Faceplate, and Cylinders
- ANSI Grade 1 vs Grade 2 Deadbolts: Choosing the Right Security Level
- How to Reinforce a Door Strike Plate for Maximum Protection
- Troubleshooting Deadbolt Alignment Issues
- Frequently Asked Questions
Last Updated: September 21, 2026
Why Residential Deadbolt Installation Matters for Home Security
A residential deadbolt installation is one of the most effective ways to improve your home's security. Unlike spring latches, deadbolts require a key or thumbturn to operate, making them significantly harder to bypass. The difference between a basic latch and a proper deadbolt can be the deciding factor in whether a burglar moves on to an easier target.
At Locksmith Of Gilbert, we help homeowners and businesses upgrade their security with proper deadbolt installation. The process requires precision, a poorly installed deadbolt won't seat correctly in the strike plate, won't lock smoothly, and won't provide the security you're paying for.
This guide covers residential deadbolt installation best practices, tools, steps, and security considerations. Whether you're replacing an old lock or installing your first deadbolt, understanding the fundamentals makes the difference between a job done right and one that needs redoing.
Deadbolt Installation Tools List: What You'll Need
Gather the right tools before starting. Using correct equipment makes the work faster and produces better results.
Essential tools for deadbolt installation:
- Tape measure (25-foot minimum)
- Pencil for marking
- Drill with variable speed (cordless preferred; 18V minimum for sustained torque)
- Hole saw bit (typically 2 1/8 inches for standard deadbolts; carbide-tipped for longevity)
- Spade bit or twist drill bit (for the latch hole, usually 1 inch)
- Screwdriver set (both Phillips and flathead; magnetic tips reduce dropped screws)
- Chisel set (for mortising if needed; 1/2-inch and 3/4-inch widths cover most scenarios)
- Hammer
- Deadbolt installation kit (comes with the lock)
- Shims (for alignment adjustments; metal shims hold better than plastic on commercial frames)
- Sandpaper or file (to smooth rough edges)
- Depth stop or tape marker (for consistent latch hole depth)
- Clamp or door holder (to prevent movement during drilling)
The installation kit that comes with your deadbolt typically includes the latch assembly, strike plate, mounting screws, and sometimes a template. Don't discard the template, it's your roadmap for accurate hole placement.
Cordless vs. corded drills:
A cordless drill is essential for this job. Variable speed lets you slow down as you approach final depth. For residential work, an 18V cordless drill with a 1/2-inch chuck handles standard hole saws.
Hole saw selection matters:
For multiple doors, a carbide-tipped hole saw lasts longer and produces cleaner edges, reducing splintering. Bi-metal hole saws are a cost-effective middle ground.
Professional-grade additions:
Measuring, Marking, and Preparing Your Door
Step 1: Measure the backset
The backset is the distance from the edge of the door to the center of the deadbolt hole. Standard residential backsets are 2 3/8 inches or 2 3/4 inches. Check your deadbolt packaging to confirm which one you have.
Measure from the door edge to the borehole center and mark clearly with a pencil, holding the tape measure perpendicular to the door edge.
Step 2: Mark the height
Most deadbolts sit 44 inches from the floor to the center of the hole. Mark this height on the door. The intersection of your backset line and height line is where the borehole center goes. Double-check both measurements before drilling.
Step 3: Prepare the door surface
Tape the area around your marked point with painter's tape to reduce splintering. Secure the door with a clamp or ensure it's fully closed and locked, movement during drilling causes misalignment.
Drilling the Borehole and Latch Hole
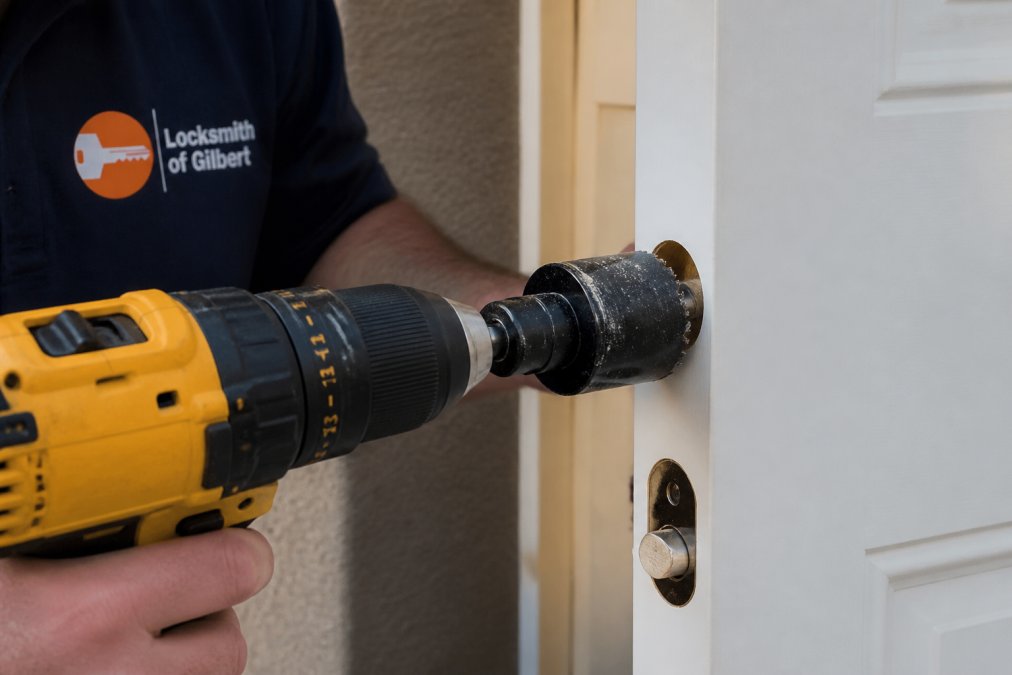
Drilling the main borehole:
Install your hole saw bit (typically 2 1/8 inches) and start at low speed to prevent skating. Once the pilot bit bites into the wood, increase speed gradually. Drill straight through, stopping when the pilot bit breaks through the other side, then finish from the inside to prevent splintering.
Drilling the latch hole:
The latch hole sits perpendicular to the main borehole, usually 1 inch below its center (check your kit). Use a 1-inch spade bit and drill straight into the door edge about 1 inch deep. Mark the depth on your drill bit with tape, too shallow and the latch won't fit; too deep and the faceplate won't sit flush.
Installing the Latch, Faceplate, and Cylinders
Installing the latch assembly:
Slide the latch into the hole and align the faceplate so it sits flat against the door edge with no gaps. Tighten the screws firmly without over-tightening, which can crack the faceplate or strip the holes.
Installing the exterior cylinder:
The exterior cylinder (the part you put your key into) slides into the main borehole from outside the door. Insert it fully until the mounting collar sits snug against the door surface.
Installing the interior assembly:
From inside, insert the interior cylinder and thumbturn, aligning the spindle with the latch assembly. Insert mounting screws and tighten evenly, alternating between screws. Test the lock, the key should turn smoothly, the thumbturn operate easily, and the bolt extend and retract fully.
ANSI Grade 1 vs Grade 2 Deadbolts: Choosing the Right Security Level
ANSI Grade 1 deadbolts are the highest security rating with at least a 1-inch bolt throw and are typically found on commercial properties and high-security installations. ANSI Grade 2 deadbolts have a minimum 3/4-inch bolt throw and offer solid security for most residential applications at lower cost. For residential deadbolt installation best practices, Grade 2 is sufficient for most homeowners; Grade 1 makes sense in high-crime areas or for maximum security.
Check the packaging or product specification sheet to find the ANSI grade. It's usually printed clearly on the box or documentation.
How to Reinforce a Door Strike Plate for Maximum Protection
The strike plate is where the bolt enters the door frame. A weak strike plate can be forced open even if your deadbolt is excellent. Reinforcement is one of the easiest security upgrades you can make.
Why strike plate reinforcement matters:
Standard strike plates use short screws that penetrate only about 1/2 inch into the door frame. A forceful kick can split the wood and force the door open. Reinforcement anchors the strike plate deep into the frame structure.
How to reinforce a strike plate:
Replace short screws with 2 1/2-inch or 3-inch screws that reach the structural framing behind the door jamb. Tighten firmly without over-tightening. Strike plates with reinforcement flanges or extra-thick metal distribute force over a wider area. For weak or damaged frames, add a door reinforcement kit with a metal plate that distributes force across a larger section.
Troubleshooting Deadbolt Alignment Issues
Even with careful installation, alignment problems can occur. A misaligned deadbolt won't lock smoothly or may not lock at all. Understanding the root cause helps you fix it correctly the first time.
The bolt doesn't fully extend or retract:
This usually means the latch hole and borehole aren't perfectly aligned. The bolt binds when it tries to move. Check that both holes are straight and at the correct depth. If the holes are slightly misaligned, you may be able to adjust the bolt assembly slightly by loosening the mounting screws, shifting the interior assembly, and retightening. If they're badly misaligned, you'll need to drill new holes.
A common cause is drilling at an angle rather than perpendicular to the door. Use a drill guide or clamp the door to a workbench to prevent drift. If the bolt binds only partway through its travel, the latch hole may be too shallow, the bolt assembly sits too far forward and catches on the strike plate opening.
The key doesn't turn smoothly:
Rough holes, debris inside the lock, or misalignment can cause stiff operation.
The bolt doesn't seat fully in the strike plate:
The lock rattles or feels loose:
Maintenance prevents most alignment issues:
Frequently Asked Questions
How far up from the floor should a deadbolt be installed?
Install your deadbolt 36 to 48 inches above the floor for standard doors. This height aligns with the door knob and creates a balanced, accessible installation. Measure from the floor to the center of the borehole to ensure consistency. For interior doors or doors with non-standard heights, adjust proportionally so the deadbolt sits roughly 12 inches above the knob.
What ANSI grade requirements apply to residential deadbolts?
The ANSI/BHMA standards define deadbolt security grades. Grade 1 offers the highest residential security with a 1-inch bolt throw and superior construction. Grade 2 provides good security with a 3/4-inch bolt throw at lower cost. Most residential applications can use Grade 2, but Grade 1 is recommended for maximum security.
What tools are required for a professional-grade deadbolt installation?
Essential tools include a drill with variable speed, hole saw (typically 2 1/8 inches), spade bit for the latch hole, tape measure, pencil, screwdriver set, and a template from your installation kit. A square helps verify alignment, and a carpenter's level ensures the strike plate sits flush. A deadbolt installation kit usually includes the template, fasteners, and shims needed for proper installation.
How do I know if my deadbolt is properly aligned after installation?
Test alignment by locking and unlocking the deadbolt while observing the bolt throw. The bolt should slide smoothly without binding or sticking. The cylinder should turn easily without resistance. If the bolt catches or the keyway feels rough, the borehole may be misaligned. Check that the strike plate is flush with the door jamb and the latch enters it cleanly. Shims behind the strike plate can correct minor misalignment issues.
Proper residential deadbolt installation best practices protect your home and give you peace of mind. The steps are straightforward when you measure carefully and drill accurately. If alignment issues arise or you'd rather leave it to a professional, Locksmith Of Gilbert offers expert deadbolt installation with precision alignment and security-grade hardware selection. Contact us for a consultation on your home's security needs.