 ultimate-guide
Smart Lock Installation for Homeowners: A Step-by-Step Guide
Last Updated: November 2, 2026
Quick Summary
Smart lock installation is a manageable afternoon project for many homeowners, but it requires careful measurement, precise alignment, and a check of door compatibility before buying. Most problems trace back to misalignment, binding bolts, or pairing issues that can be fixed with the steps in this guide.
- Measure door thickness, backset, cross-bore, and edge-bore before buying any lock model.
- Standard interior doors are 1-3/8 inches thick; standard exterior doors are 1-3/4 inches.
- Most smart locks require a 2-1/8-inch cross-bore and a 1-inch edge bore.
- Tighten through-bolts evenly and stop, because overtightening can crack the keypad housing or pinch the cable.
- Replace batteries first when a lock stops responding, since low power causes most intermittent failures.
Table of Contents
- Smart Lock Installation Overview: What the Job Involves
- Smart Lock Compatibility With Existing Deadbolt and Door Frame
- Smart Lock Installation Tools and Materials You Will Need
- Step-by-Step: Removing the Old Lock and Mounting the New Hardware
- Smart Lock Installation Time: Realistic Estimates for DIY and Pro Installs
- Smart Lock Troubleshooting: Fixing Common Symptoms After Installation
- Booking Help for Your Smart Lock Install in Gilbert
- Frequently Asked Questions
Smart Lock Installation Overview: What the Job Involves
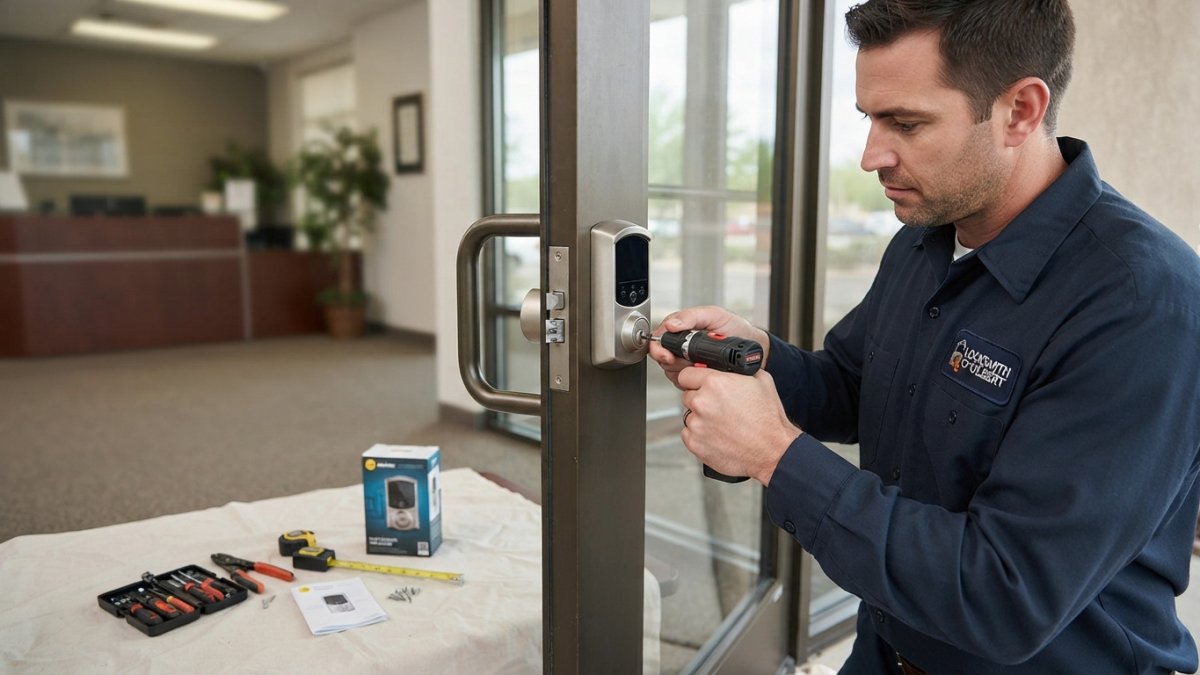
A smart lock installation replaces the existing deadbolt or lever set with a motorized lock body, an exterior keypad or touchscreen, and an interior mounting unit that connects the two through internal cables. Most homeowners can complete the job in an afternoon, but the work is more involved than swapping a standard deadbolt. The motor, batteries, and wiring have to fit inside the door, and the lock has to line up precisely with the existing bore holes and strike plate.
Alignment is the step where many installs stall, so homeowners should budget extra time for it. Plan for the door to take longer than the box suggests, especially on an older house where the frame has shifted over the years.
The core steps follow a predictable order: confirm the door fits the product, remove the existing hardware, mount the exterior and interior assemblies, connect the cables, and program the codes and app.
Smart Lock Compatibility With Existing Deadbolt and Door Frame
Compatibility is the single most common reason a smart lock installation stalls. A lock designed for one door thickness, backset, and bore pattern will not seat correctly in another, no matter how carefully you install it. Before you buy, measure the door and compare the numbers to the product's published specifications. Door thickness, metal doors, and unusual bore patterns can all limit which models fit, so check the product's published specifications against your door before buying.
Measuring Door Thickness, Backset, Cross-Bore, and Edge-Bore
You need four measurements. Use a tape measure and write each number down.
- Door thickness: Measure the edge of the door, not the face. Standard interior doors are 1-3/8 inches; standard exterior doors are 1-3/4 inches. If your door is thicker than 1-3/4 inches, check whether the lock's mounting bolts are long enough or whether the manufacturer sells a thick-door kit.
- Backset: This is the distance from the edge of the door to the center of the large bore hole. Most residential locks use either 2-3/8 inches or 2-3/4 inches. Measure from the door edge to the center of the hole, not to the edge of the hole.
- Cross-bore diameter: This is the large round hole through the face of the door. Most smart locks require a 2-1/8-inch cross-bore. If your hole is smaller, you will need to enlarge it with a hole saw, which is a job for a professional if you are not comfortable drilling a door.
If any measurement falls outside the product's range, you have two options: choose a different model or have the door adjusted. Trying to force a mismatched lock almost always leads to a binding bolt or a damaged door edge. For doors with nonstandard dimensions, a locksmith can advise on the right fit.
Strike Plate Alignment and Frame Condition
The strike plate is the metal piece on the door frame that receives the bolt. Even a perfectly installed lock will fail to latch if the strike plate is misaligned, and a smart lock's motor puts extra strain on a bolt that does not slide freely.
Inspect the wood around the strike for cracks or crushed fibers. A loose strike screwed into splintered wood will not hold the door against a forced entry attempt.
Nonstandard Doors and When to Stop Before Buying
Some doors are not good candidates for a DIY smart lock install. Metal doors, doors with glass panels near the lock, and doors with unusual bore patterns may require a specific model or professional modification. If your door has a mortise lock or a multipoint locking system, most consumer smart locks will not fit without significant adaptation. In those cases, consult a locksmith before purchasing, because the wrong lock can leave you with a nonfunctional door and a restocking fee.
Smart Lock Installation Tools and Materials You Will Need
Gather everything before you start. Pausing mid-install to find a driver bit wastes time and leaves the door partly disassembled.
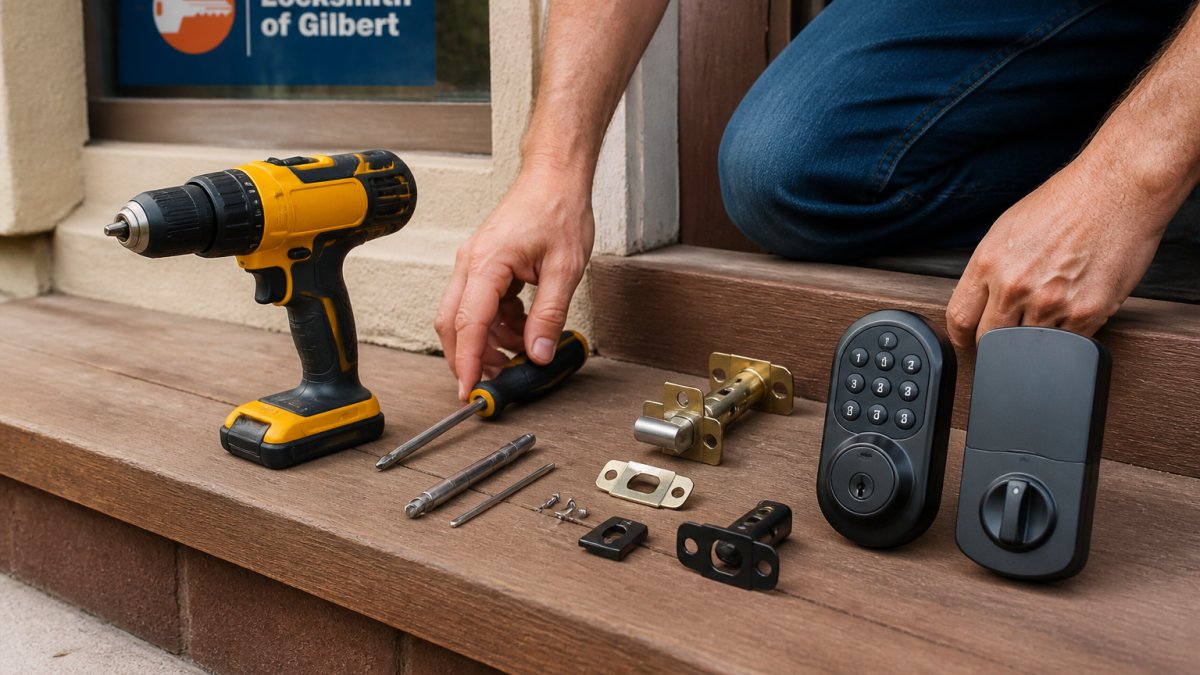
- Power drill with a driver bit set and a 1/2-inch or 3/8-inch drill bit for pilot holes
- Phillips and flathead screwdrivers
- Tape measure and pencil for marking the door
Some installs also need a door-thickness shim or a longer set of screws for thicker doors. Check the manual's parts list against what came in the box before you start, because a missing spacer is the most common reason for an unexpected trip to the hardware store.
Step-by-Step: Removing the Old Lock and Mounting the New Hardware
Work through these steps in order. Keep the existing lock's screws in a labeled cup so you can match them later if needed.
- Test the new door fit. Hold the mounting plate against the door and confirm the bore alignment matches the marks you made earlier.
- Remove the interior lock assembly. Unscrew the interior handle or knob and the two through-bolts. Keep the old latch in place until the new hardware is ready.
- Remove the exterior hardware. Unscrew the exterior deadbolt or knob and pull the lock body out of the door. Save the old latch unless the new kit includes a replacement.
- Thread the cable. Feed the lock's internal cable through the door bore, taking care not to pinch or kink it against the edges.
- Mount the exterior assembly. Insert the exterior unit, connect the cable to the interior unit, and tighten the through-bolts evenly so neither side pulls the door out of square.
- Attach the interior mounting plate. Connect the cable pins, install the batteries, and secure the plate with the included screws.
- Install the strike plate. Position the strike on the frame, mark the screw holes, and drill pilot holes into solid framing.
- Test the bolt. Operate the lock by hand and with the app. The bolt should extend and retract smoothly without binding.
Watch out: Overtightening the through-bolts can crack the exterior keypad housing or pinch the internal cable. Snug the bolts evenly, then stop.
Smart Lock Installation Time: Realistic Estimates for DIY and Pro Installs
The time a first-time DIY installation takes depends on the door's condition and how many steps require adjustment.
Pairing the lock with the app, adding user codes, and testing remote access tends to take another 15 to 30 minutes.
Pricing depends on the lock model, door condition, and any repairs needed, so contact us for a quote specific to your home.
Smart Lock Troubleshooting: Fixing Common Symptoms After Installation
Most post-installation problems come down to three causes: alignment, power, or pairing. Work from the symptom to the likely fix, and change one thing at a time so you know what solved the problem.
The Bolt Binds or Will Not Extend Fully
A binding bolt is the most common complaint. The motor strains, the lock drains batteries, and the door may not latch. Start by watching the bolt as it moves.
If the bolt extends smoothly by hand but not with the motor, the issue may be calibration. Run the lock's calibration routine through the app, which teaches the motor the full travel of the bolt.
The Lock Does Not Respond to the Keypad or App
Replace the batteries first, even if the lock is new. Low power causes most intermittent failures, and fresh batteries eliminate a common variable. Confirm the lock is within Bluetooth or Wi-Fi range.
If the keypad lights up but the code does not work, confirm the code was saved correctly and that the lock is not in a privacy or lockout mode.
The App Shows the Lock as Offline or Connectivity Drops
For Wi-Fi and hub-based locks, an offline status usually means the lock lost its connection to the network. Restart the lock by removing and reinserting the batteries, then check the app for firmware updates.
If connectivity drops repeatedly, check for interference from other wireless devices and consider moving the hub or router closer. Some locks support only 2.4 GHz Wi-Fi, so confirm your network settings match the lock's requirements.
The Door Does Not Latch When Closed
A door that does not latch is an alignment problem, not a lock problem. The latch or bolt may be misaligned with the strike. Adjust the strike position or check that the door sits square in the frame. If the door has swollen or the hinges have sagged, the lock may need to be repositioned. In older homes, a strike plate with an adjustable or oversized opening can compensate for minor misalignment without moving the lock.
Calibration Fails or the Lock Reports an Error
Calibration failures usually mean the bolt cannot complete its full travel. Check for binding at the strike, confirm the door is fully closed during calibration, and make sure the batteries are fresh. If the lock has a manual calibration option, follow the manufacturer's sequence exactly. Persistent calibration errors may indicate a defective motor or sensor, and the lock may need replacement under warranty.
When to Call a Professional
Call a locksmith if the door frame is out of square, the bore holes do not align, or the lock requires drilling or wiring that you are not comfortable with. Professional diagnosis is also worthwhile if the lock is under warranty but the retailer requires an installation report, or if the door is a custom or antique model where mistakes are costly to repair.
Booking Help for Your Smart Lock Install in Gilbert
Installing a smart lock is a manageable project for many homeowners, but a misaligned door, a binding bolt, or a lock that will not pair can turn a one-afternoon job into a weekend problem. Locksmith Of Gilbert serves homeowners across the eastern valley of the greater Phoenix area with 24/7 locksmith services, including lock upgrades and security improvements. Contact us for a quote.
Frequently Asked Questions
Can a homeowner install a smart lock themselves?
Most homeowners with basic hand tools can install a smart lock on a standard residential front door, especially when the existing deadbolt is a common bore size and the door is in good condition. The job usually involves removing the old deadbolt, fitting the interior and exterior assemblies, connecting the cable, and testing the bolt travel. Doors that are warped, poorly aligned, or have damaged frames often need repair first. If the fit is uncertain or the door does not latch cleanly, a professional installation avoids costly mistakes and keeps the warranty intact.
Will a smart lock fit my existing deadbolt?
Many smart locks are designed to fit standard deadbolt bores, but compatibility depends on door thickness, backset measurement, and the bore hole diameter. Check the product specifications against your door before buying. Some kits include adapters or alternative strike plates, while others require a specific deadbolt type. A quick measurement of the existing lock prevents returns and wasted time.
How long does smart lock installation take?
A first-time DIY installer should plan for a few hours, including setup in the companion app. Time varies with door condition and lock model. Allow extra time if the door needs alignment, the frame needs repair, or the wiring for a keypad or cable needs adjustment. Testing the lock several times before you rely on it is part of the job.
Do smart locks work if the Wi-Fi goes out?
Many smart locks continue to work through a physical key, keypad codes stored on the device, or Bluetooth connection to a phone, even when Wi-Fi is down. Remote features such as viewing lock activity or unlocking from another city usually stop until the connection returns. Before relying on any model, confirm how it operates offline and keep a physical backup key accessible. Planning for power loss and battery replacement is part of the same setup.
Can a locksmith install a smart lock?
Yes. A locksmith can install a smart lock, verify compatibility with your existing deadbolt and door, and set up user codes or app access. Professional installation is especially useful for older doors, multi-point locking systems, or properties where a secure, correctly aligned bolt matters most. Locksmith of Gilbert can help you evaluate your door and schedule an installation. Ask for current pricing directly, since costs depend on the lock model and the work required.
How do you troubleshoot a smart lock that will not lock smoothly?
Start by checking whether the deadbolt is aligned with the strike plate, since friction in the bolt is the most common cause of stiff locking. Loosen the mounting screws slightly and see whether the lock operates freely without the door closed. Replace batteries if the motor sounds weak, and recalibrate the lock through its app if the manufacturer recommends it. If the problem persists, the door may need adjustment or the frame may be shifting, which a professional can diagnose.